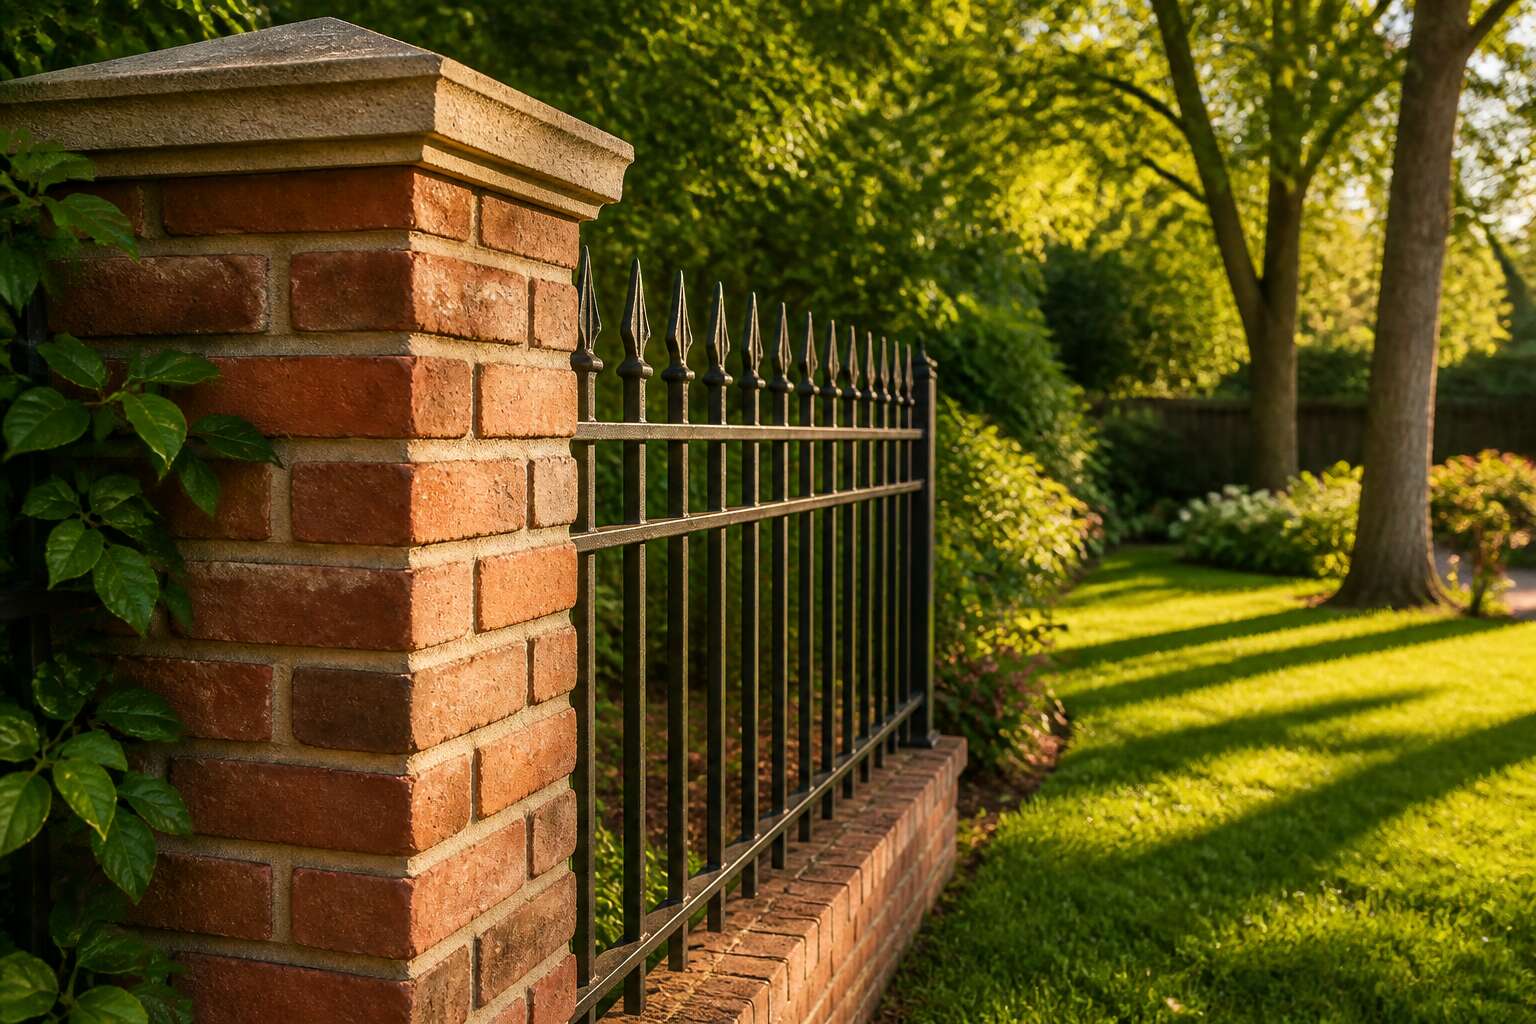
Design Styles for Masonry Post Boundaries
Modern Minimalist Aesthetics
Modern minimalism in masonry post boundaries is about discipline, not subtraction. The brick pillar stops being an ornament and takes a structural role. In South Africa, where suburban streets lean toward ornate stonework, a clean, flush pillar reads as restraint. The same applies to fences with brick pillars, which often default to ornamental excess.
The material carries the visual weight. A plastered pillar with a subtle shadow gap, paired with horizontal timber slats, feels contemporary without shouting. Proportion matters. Chunky pillars overwhelm a narrow erf; slender ones look apologetic next to a double storey.
Consider these principles when specifying:
- Match the pillar width to the gate hardware.
- Use a consistent mortar colour.
- Keep the coping flush or slightly recessed.
Fences with brick pillars succeed when the geometry stays honest. No fake quoins, no Mediterranean flourishes, just straight lines and a calm palette. That is harder than it looks.
Classic Farmhouse Appeal
Classic farmhouse appeal does not romanticise the past. It respects solid boundaries without hostility. In South Africa, the homestead vernacular uses brick pillars that show wear from weather and time. That texture is what fences with brick pillars bring to a modern erf.
Soften the geometry with a wider pillar cap, maybe a gentle arch. Let the brick colour vary. A farmer would not tolerate perfection. The mortar should be slightly recessed, catching shadows. These are not decorative choices. They respond to light and weather. For fences with brick pillars, this style asks for honest materials and straightforward joints.
Contemporary Mixed Materials
The surest sign of a suburb in transition is the sudden appearance of corten steel. It rusts, but with intention. When paired with the structural honesty of fences with brick pillars, the effect is a quiet statement of permanence. The steel provides a planar surface, while the masonry offers vertical rhythm. Together, they frame a property without shouting.
Material combinations that work well:
– Powder coated aluminium slats in charcoal, which offer a matte texture.
– Vertical timber battens, specifically treated balau or garapa, for warmth.
– Gabion baskets filled with local stone, for a grounded, elemental feel.
The trick is to let each material perform its own function. The brick pillar takes the load, while the infill panels merely screen. This honest division of labour creates a fence with visual logic. A heavy pillar demands a light infill; a slender pillar can carry a more solid panel. The proportions must be calculated, not guessed.
This is not about decorative flourish. It is about a contemporary expression of enclosure that acknowledges the African sun and the Highveld storm. The play of light across a ribbed steel surface changes the perception of the boundary throughout the day. The result is a fence that feels considered, even inevitable. It is a modern choice for those who understand that fences with brick pillars are an architectural feature, not a concession.
Color and Texture Combinations
The mortar joint determines the look of any fence with brick pillars. Before choosing the brick, decide the colour of the cement that binds it. A cream stock brick with a pale mortar appears soft and airy; the same brick with a dark grey joint reads structural and severe. The Highveld sun amplifies either effect by noon.
- Charcoal masonry with a near-black mortar for a monolithic boundary
- Terracotta face brick with a buff mortar for warmth without paint
- Bagged brick, with the mortar smeared over the face, for a handcrafted finish
Texture is the other defining choice. A rubbed brick presents a smooth, dense surface. A wire-cut brick holds shadow in its fine striations. I prefer the latter for fences with brick pillars; it catches the low afternoon light and gives the boundary a character that shifts through the day. Paint conceals all texture, so reserve it for repairs or for unifying mismatched older masonry.
Essential Materials and Tools for Construction
Choosing the Right Brick Type
Selecting materials for fences with brick pillars demands more attention than picking a pleasing shade. A face brick with low water absorption will survive Highveld thunderstorms and coastal salt. Extruded or clay stock units both perform, but test the colour against your mortar before committing.
Tools matter as much as the masonry. A spirit level, string line, and rubber mallet keep courses true, while a brick hammer and mixer save your back.
- Reinforcement bars for the pillar core
- Concrete mix for the footing
- Damp proof course to stop rising damp
Mortar ratio is the quiet hero. A 1:5 cement to sand blend resists wind and rain without cracking. For lasting fences with brick pillars, the footing depth ultimately decides whether your structure stands straight or leans like a tipsy guest at a braai.
Mortar Mix Ratios and Additives
For fences with brick pillars, the material list covers more than you might expect. Galvanised reinforcement bars anchor the pillar core, while a damp proof course membrane stops rising damp from the Highveld clay. The footing needs crushed stone and river sand, and don’t forget shutter ply for the formwork!
Mortar mix ratios deserve careful attention. A 1:4 cement to sand ratio with a plasticiser additive gives you strength and workability. In coastal regions, fold in a waterproofing agent to resist salt air. These additives cost little, but they change the mix entirely.
- Galvanised rebar for vertical reinforcement
- Damp proof course membrane
- Plasticiser or lime for workability
Reinforcement Options for Pillars
The pillar is the spine of any fence, and fences with brick pillars rely on a hidden steel skeleton for their strength. Vertical reinforcement bars, tied with stirrups at regular intervals, give the pillar its resistance to lateral wind loads. The concrete core, poured after the brickwork is laid, binds the whole assembly into one monolith.
For taller pillars, consider extending the reinforcement cage into the footing. This anchors the column against the heaving Highveld clay. The tools themselves are modest but essential:
- a trowel for pointing
- a spirit level for plumb lines
- a wheelbarrow for concrete
Shutter ply and props hold the concrete in place while it cures. The rebar needs to be tied with binding wire, not spot welded, to allow for thermal movement.
Step-by-Step Guide to Building Brick Pillars
Preparing the Foundation and Footings
The most critical aspect of fences with brick pillars is the foundation you never see. South African soils vary from sandy coastal profiles to expansive inland clays, and each demands a different footing depth. For a standard pillar of 220 by 220 millimetres, excavate square holes at least 600 millimetres deep, deeper if your soil contains heavy clay. Compact the base thoroughly before pouring. Proper footings require careful sequence:
- Set out the pillar positions with string lines and check diagonal measurements.
- Excavate each hole square, ensuring the sides remain vertical.
- Tamp the base and add a 100 millimetre layer of crushed stone.
- Install steel reinforcement and concrete forms before pouring.
This approach keeps your fences with brick pillars true and stable.
Laying the First Course Accurately
A 3mm deviation at the foundation line translates into a 30mm lean at the top of a 1.8 metre pillar. That single fact should dictate your patience on the day you lay the first course. This initial layer is not merely the base; it is the template for every subsequent brick. Rushing this step will compromise the entire structure.
The first course demands absolute precision. Your string lines are now your primary reference. Position each brick against the line, but do not rely on the line alone. Use a spirit level on every face and check the diagonal measurements again, once the mortar is spread. The mortar consistency is as critical as the brick position.
1. Apply a full mortar bed, roughly 15mm thick, for the first brick.
2. Lay the corner brick first and set it perfectly level.
3. Work outward from that corner, using the string line as your guide.
4. Tap each brick gently with the handle of your trowel to seat it.
Do not backfill or continue upwards until the mortar has set enough to hold the bricks firmly. The character of your fences with brick pillars is decided in this first layer. A true, level start makes every subsequent course straightforward. A flawed start forces you to compensate with thicker mortar joints higher up, a visible sign of poor workmanship. Take the time now to measure and re-measure, because correcting a leaning pillar later is a far greater task than laying this first course correctly. The entire integrity of your fence depends on this physical equation.
Installing Post Anchors and Brackets
A steel gate hung 20 millimetres out of plumb will pull its own hinges loose within a year. That single number should shape your approach to installing post anchors. For fences with brick pillars, the bracket is set before the pillar rises, not after.
Cast-in sockets live inside the brickwork. Bolt-down anchors sit on top of the cured footing. Each serves a different load. A heavy driveway gate needs the cast-in shoe with deep embedment. A pedestrian gate performs well on a bolt-down bracket.
The common installation order is simple:
- Mark the anchor centres from the string line.
- Bed the brackets in stiff mortar.
- Check plumb on both faces before the mortar grabs.
Drifting even 5 millimetres now transfers stress directly to the brick pillars. Fix it at this stage, or you will fix it with a grinder later.
Building the Pillar Core and Filling
Once the anchor brackets are bedded and true, the pillar core carries the entire load. Core construction requires a disciplined sequence. Mix mortar to the ratio specified for the brick type. Load the cavity evenly, never more than three courses at a time. Each lift needs consolidation, not compaction. Tap the bricks with a trowel handle to settle the fill. For hollow bricks, use a stiff mortar slurry to bond the internal webs.
- Build corner bricks first.
- Fill the centre with mortar and brick offcuts.
- Screed the top before setting the next course.
- Check verticality on every fifth course.
This routine keeps fences with brick pillars straight and dense. Bulges appear when the fill is too wet or placed too early.
Curing and Waterproofing the Finished Pillars
Curing takes time and steady moisture. Fresh mortar needs at least seven days of damp conditions to reach its full strength. Cover the brickwork with damp hessian and mist it every morning. If the mortar dries too quickly, hairline cracks form and allow water to enter. Rushing this stage weakens the joints and shortens the life of fences with brick pillars.
After curing, waterproofing protects the pillar. Use a clear silane siloxane sealer and apply two coats. Let the first coat soak in before adding the second. The top of the pillar needs attention because rain pools there and works its way down through the core. That is where most failures start.
- Check the coping cap sits flush with the brick edges
- Confirm mortar joints are flush, not recessed
- Reapply the sealer every two to three years
These steps keep fences with brick pillars standing straight and dry through highveld storms and coastal salt air. A well cured and sealed pillar avoids the damp stains and spalling that ruin so many others.
Attaching Fence Panels and Gates
Attaching panels and gates to fences with brick pillars demands precision. Set the panel brackets into the mortar joints while the brickwork is still fresh. This locks the hardware into the wall instead of relying on surface fixings that weaken over time. For gates, weld the hinge plates to the galvanised post anchors before pouring the core. That connection carries the entire swinging weight.
Measure twice before setting the brackets. A level line across the pillar faces ensures panels sit evenly and gates close without drag. Mark the bracket positions on the cured brick face, drill and plug with masonry anchors rated for wind load, and use stainless steel bolts to resist corrosion in coastal air.
- Mark bracket positions on the cured brick face
- Drill and plug with masonry anchors rated for wind load
- Use stainless steel bolts to avoid corrosion
Hang the gate last, after panels are secure. Adjust the hinges so the gate remains level and allow a 10mm clearance for ground movement. Fences with brick pillars carry weight differently from timber posts, so fit a drop rod or gate wheel for wide openings.
Cost Breakdown and Budget Planning
Material Costs Per Pillar
Budgeting for fences with brick pillars starts with the pillar itself, not the panels between them. A standard 1.2 metre pillar needs roughly 60 facing bricks, a bag of mortar mix, and a galvanised steel core. In South Africa, that material cost often lands between R800 and R1 200 per pillar, before transport and labour. The real variance comes from brick type. Extruded clay bricks run cheaper, while handmade stock bricks can push your pillar budget up by 30%.
Concrete for the footing adds another R150 to R300 per pillar if you mix it yourself. I have seen quotes where contractors hide these figures inside a blanket price, so ask for an itemised breakdown. That way, you compare apples with apples.
- Facing bricks: R450 to R750
- Cement and sand: R200 to R300
- Steel core and anchors: R150 to R250
These numbers shift with your region and supplier, but they give you a realistic baseline for fences with brick pillars.
Labor and Installation Fees
Labor costs are where many fence budgets quietly go off the rails. A skilled bricklayer in South Africa charges between R350 and R600 per day, and a single pillar takes about a day to build. That places installation fees for fences with brick pillars at roughly R400 to R700 per pillar, though rural rates run lower and metropolitan crews charge premiums.
Contractors often bundle labor with material costs, which can obscure the true price. An itemised quote is the only way to see what you pay for the work itself. The quality of the installation matters more than the price, a badly built pillar will fail within five years.
– Bricklayer labour: R350 to R600 per day
– Mixer and scaffold rental: R150 to R300 per project
– Cleanup and site prep: R100 to R250 per day
Here is the catch. Many quotes price per pillar, but the total depends on the number of pillars and the complexity of the layout. Corners and gate posts require extra time, which raises the per-pillar cost. Ask for a breakdown that separates labour from materials, then compare line items across quotes. The cheapest option rarely delivers the longest lifespan for fences with brick pillars, so weigh the savings against the risk of future repairs.
Factors That Influence Total Price
A fence budget is a living document, one that shifts with every decision you make. The true cost of fences with brick pillars extends beyond the obvious line items, settling into the quiet details of your property. Site access matters, if a crew cannot drive a mixer to the back corner, expect a premium. Terrain also whispers its demands, sloping ground requires stepped foundations and additional shuttering.
The number of pillars multiplies the total, but so does their purpose. A gate post carries the weight of daily use, demanding deeper footings and heavier reinforcement. This distinction elevates the price of these structural anchors.
Beyond the visible, consider the concealed costs:
– Rubble removal and disposal fees, often R200 to R500 per load
– Water supply for mixing mortar, a logistical detail some contractors charge for
– Municipal approval fees, which vary by region and can delay timelines
Budget planning for fences with brick pillars is an exercise in anticipation. The initial quote is a skeleton, and the flesh of the final price is determined by soil conditions, weather delays, and the finishing touches like capping and waterproofing. A slight adjustment in pillar height or brick colour can alter the material tally, and the overall cost, more than you might expect. The most expensive mistake is underestimating the foundation work, as unstable ground demands deeper excavations that no fixed quote can accurately predict.
Long-Term Value and Property Resale
The average South African home spends roughly 6% of its total value on perimeter fencing, and fences with brick pillars command a significant share of that figure. Breaking down the cost shows where your money goes. Materials claim the largest portion, with brick type alone shifting the tally by 30%. Labour follows closely, as skilled bricklayers are not cheap. The foundation work, often underestimated, quietly consumes a fifth of the budget.
Long-term value changes the calculation entirely. Fences with brick pillars are permanent structures. They do not warp, rust, or rot. They shrug off harsh weather and need little maintenance. This durability translates directly to property resale:
– A solid perimeter fence adds curb appeal that buyers notice immediately
– Brick pillars signal permanence and quality, differentiating your home from neighbours
– The reduced upkeep costs appeal to practical buyers who know the true price of timber or palisade fencing
The financial picture clarifies when you view the fence as an asset rather than an expense. The upfront cost of fences with brick pillars fades against the decades of service and the resale premium they generate.
Low-Cost Alternatives Without Sacrificing Style
Cost breakdown for fences with brick pillars often surprises homeowners. The foundation and brickwork demand the bulk of the budget, but smart planning softens the blow. A smaller pillar footprint or a less expensive brick face reduces the tally, while a consistent mortar mix cuts waste. These choices trim costs without altering structural integrity.
Low-cost alternatives preserve the permanent look. Homeowners often:
- Pair brick pillars with affordable infill panels.
- Use standard stock bricks for the core, face bricks for the outer layer.
- Reduce pillar height where security allows.
Fences with brick pillars remain a sound investment, even on a tighter budget. Prioritise the pillars, economise elsewhere.
Maintenance and Longevity of Brick Pillar Enclosures
Cleaning and Sealing Recommendations
Most fences with brick pillars fail from neglect, not poor construction. In South Africa, the rainy season exposes every flaw, so a yearly inspection is worth the effort. Walk along the fence line after the storms, checking for cracks or efflorescence, the chalky white stain of trapped moisture.
Cleaning is straightforward. I mix a mild detergent with water, scrub with a nylon brush, then rinse. Avoid pressure washers, as they strip the mortar joints. After cleaning, apply a breathable masonry sealant every three to five years. This preserves the brick’s colour and keeps water out without trapping vapour inside.
If you want a schedule, consider this:
- Inspect pillars for loose caps or hairline cracks.
- Clean surfaces with a brush and detergent.
- Seal the brick after it dries completely.
That routine costs little but adds decades to the lifespan of your fence!
Repairing Cracks and Mortar Damage
Even well-built fences with brick pillars eventually show their age. The first sign is often a hairline crack along a mortar joint, barely visible until the next downpour. Water seeps in, and spalling begins. What started as a cosmetic flaw becomes a structural one.
Repairing mortar damage, what masons call repointing, requires patience. I chip out the loose material with a chisel, going deep enough to reach sound mortar. Then I pack in fresh mix, matching the original colour. For larger cracks, I use a lime-based mortar that flexes slightly. This works for most fences with brick pillars, regardless of age.
- Check the crack’s width and depth before mixing any repair mortar.
- Remove all loose debris with a stiff brush, not water.
- Pack the repair in layers, letting each one set before adding the next.
Delaying these repairs multiplies the cost. A small crack costs an afternoon to fix. A collapsed pillar costs thousands and compromises the entire fence line.
Preventing Moisture and Frost Damage
One frosty Highveld morning can undo years of brickwork. Moisture does the most damage to fences with brick pillars. In South Africa, where summer thunderstorms arrive with little warning, water finds its way through tiny imperfections. Frost then does the real damage. When trapped moisture freezes, it expands by roughly nine percent and pushes against the brick from within. That expansion turns hairline cracks into structural failures.
The key is preventing water from lingering. Check the caps on each pillar. A cracked or missing cap allows water to pour directly into the core. Also watch for soil buildup against the base. When earth rests against the brick, it retains moisture and breeds dampness.
- Ensure the ground slopes away from each pillar base.
- Keep weep holes clear so trapped water can escape.
- Trim plants that hold moisture against the brickwork.
These small precautions extend the life of fences with brick pillars considerably.


0 Comments